Pumpkin Spice Protein Shake

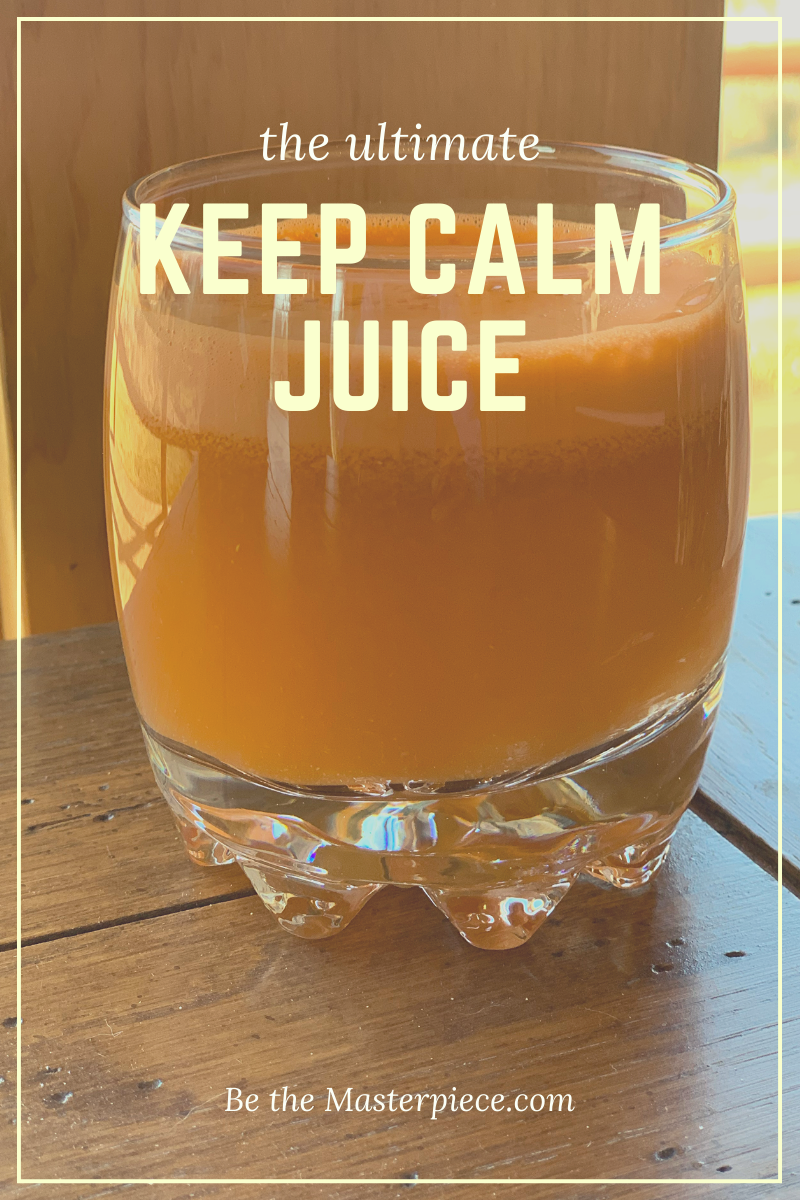
October does not need to be the start of the end of you working on being the best version of YOU! Instead of munching on the candy corn, enjoy this festive drink and keep your momentum in check to keep on doing those things that make you amazing!

Pumpkin Pie Protein Shake
Yield 1
Author Karin Nicole at Thrive Natural Nutrition
Prep time
5 Min
Total time
5 Min

Pumpkin Pie Protein Shake

Ditch the Halloween candy and make this amazing festive protein shake instead!

Ingredients

Pumpkin Pie Protein Shake
  • 1/2 cup vanilla almond milk
  • 1/2 frozen banana
  • 1 tablespoon pumpkin puree
  • 2 scoops vanilla protein powder
  • 1/4 teaspoon pumpkin pie spice
  • cinnamon

Instructions

  1. Blend ingredients together.
  2. Put in your favorite festive mug
  3. If desired, add a touch of sugar free whip cream.
  4. Sprinkle with cinnamon and enjoy!
Did you make this recipe?
Tag @karinnicole_allumbaugh on instagram and hashtag it karinnicole

Chai Spice Butternut Squash Muffins

Not sure what to do with your butternut squash? I’ve got you covered, with this amazing recipe!!

Yield: 18
Author: Karin Nicole at Thrive Natural Nutrition
Chai Spice Butternut Squash Muffins

Chai Spice Butternut Squash Muffins

Ingredients

Chai Spice Butternut Squash Muffins
  • 2 pounds butternut squash, peeled, seeded, chopped
  • 1 Tbsp olive oil
  • 3 cups gluten free oats
  • 1 Tbsp pumpkin pie spice
  • 1 tsp ground cardamom
  • 1 1/2 tsp baking soda
  • 1/2 teaspoon salt
  • 1 cup almond milk (or milk of choice)
  • 1/2 cup maple syrup
  • 2 eggs
  • 3 Tbsp melted coconut oil
  • 1 teaspoon vanilla extract

Instructions

  1. Preheat oven to 400 degrees. Line a baking sheet with parchment paper.
  2. Peel, seed, and dice butternut squash.
  3. Line muffin tins with muffin liners.
  4. Bake butternut squash for 20 minute until soft. Set aside.
  5. Turn oven to 375 degrees.
  6. Add oats, pumpkin pie spice, cardamom, baking soda, salt to food processor or blender. Process until it resembles flour. Add to mixing bowl.
  7. To blender or food processor, add butternut squash, milk, maple syrup, coconut oil, and vanilla and process until creamy. Add eggs and process until smooth.
  8. Add wet ingredients to the dry ingredients. Stir until combined.
  9. Add to muffin liners, filling 2/3 full, and bake for 15 minutes or until cooked through.
Did you make this recipe?
Tag @karinnicole_allumbaugh on instagram and hashtag it #karinnicole

Protein Cranberry Almond Scones

Enjoying baked goods is a treat, usually with too much excess sugar, and not enough protein.

These scones are the exception!

Yummy baked good goodness, without the excess sugar and carbs! I think you’ll love them too!

One of the keys is to use super cold yogurt, so do not take out of the yogurt and leave it sitting on the counter until you get to this part! (You may even want to place it in the freezer for a few minutes before you get to this step.)

tempImageZCPCkZ.gif

When it comes to forming it into a disk, make sure your disk stays approximately 3/4 inch thick, which will probably mean you’ll have a diameter of 7-8 inches. This pastry cutter is my favorite way to divide into 8 equal pieces.

tempImageLM7vkH.gif

Carefully move divided scones away from one another to bake.

All you need now is a warm cup of coffee or tea to enjoy with these scones. Or if you are like a good friend of mine, you may also enjoy them with a cup of stew or soup!! (I propose a double batch though, as you’ll still want some with your coffee in the morning!

Protein Cranberry Almond Scones

Protein Cranberry Almond Scones

Yield: 8
Author:
Prep time: 10 MinCook time: 18 MinTotal time: 28 Min
What an incredible way to enjoy a baked treat, but also get in your protein!! Enjoy these scones with your favorite herbal tea!

Ingredients

  • 1 cup gluten free flour blend
  • 1/4 cup vanilla protein powder
  • 1/4 cup unflavored collagen 
  • 1/4 cup almond flour
  • 1 1/2 tsp baking powder
  • 1/2 tsp baking soda
  • 1/2 tsp salt 
  • 1 cup COLD vanilla yogurt, lightly sweetened or nonsweetned 
  • 3-4 Tbsp maple syrup
  • 1/3 cup juice sweetened cranberries
  • 1/4 cup sliced almonds

Instructions

  1. Combine dry ingredients together.  
  2. Add in yogurt and maple syrup.  Stir to combine.  
  3. Add in almonds and cranberries
  4. On a piece of parchment paper, shape into a round ball and then form into a disk, approximately 8 inches in diameter, and cut into wedges.  
  5. Separate wedges on the parchment paper.  
  6. Bake at 400 degrees approximately 18 minutes, or until golden brown on top.
Did you make this recipe?
Tag @karinnicole_allumbaugh on instagram and hashtag it #karinnicole

Beef and Butternut Squash Stew

It’s a nutritional rock-star stew to get your year off to a phenomenal start!

beef stew.jpg


Grass fed beef is lean and full of micronutrients- if you can get it, it's not the same beast as the conventional counterpart. Winter squash is a nutritional powerhouse with betacarotene (vitamin A) and high fiber good for you carbs. Kale... kales good for everything! Greens are a super food you should strive for daily! And it’s a cinch to throw together!

Start with your onions. Saute in a nonstick pot, or add a little bit of healthy oil (olive oil, avocado oil, or some untoasted sesame oil). Add the ground beef and brown until cooked through.

Next add in the minced garlic, tomato sauce, and broth. Combine with the winter squash.

Here’s the thing with this recipe… any kind of winter squash will do! We have quite the store of squash from this years garden. I chose a big sweet meat squash for this recipe that I had already prepared and diced for the freezer. Costco sells a cubed butternut squash that would be great. Other phenomenal choices could be acorn squash, pumpkin, or another winter squash. I would not use spaghetti squash for this recipe though, as the consistency would be much different.

stew.jpg


kale.jpg

When the squash is cooked through, add chopped kale.

stew2.jpg

Cook about 5 more minutes, and enjoy!

Yield: 8
Author: Karin Nicole at BeTheMasterpiece.com
Beef and Butternut Squash Stew

Beef and Butternut Squash Stew

Prep time: 45 MinTotal time: 45 Min

Ingredients

  • 2 onions, chopped
  • 5 cloves garlic
  • 3 pounds ground beef, grass fed 
  • 29oz can tomato sauce
  • 2 pounds chopped winter squash
  • 1 tsp thyme
  • 1 Tbsp basil
  • 3/4 tsp pepper
  • 2 tsp salt
  • 16 oz. fresh or frozen chopped kale 

Instructions

  1. Brown the onions.
  2. Add beef, brown.
  3. Add remaining ingredients through salt.  Cook until squash is desired softness.
  4. Add kale in the last few minutes of cooking.
  5. Serve and enjoy

Calories

333.13

Fat (grams)

11.42

Sat. Fat (grams)

4.80

Carbs (grams)

22.32

Fiber (grams)

6.42

Net carbs

15.89

Sugar (grams)

9.54

Protein (grams)

39.36

Sodium (milligrams)

1229.93

Cholesterol (grams)

83.35
Did you make this recipe?
Tag @bethemasterpiece on instagram and hashtag it #karinnicole


Lemon Dill Dressing

dilldressing.JPG

The greens are going crazy in the garden, and since I try and incorporate them every day, changing up the dressing makes it super satisfying! Luckily, the dill is taking off as well. Enjoying some dill dressing today! 

Author:
Print
Lemon Dill Dressing

Lemon Dill Dressing

Prep time: Cook time: Total time:

Ingredients:

  • 1/2 cup olive oil
  • Juice of half a lemon
  • 2 Tbsp Dijon mustard
  • 2 tsp maple syrup
  • 1 clove garlic
  • Salt, pepper to taste

Instructions:

  1. Combine all ingredients in a dressing shaker.  
  2. Pour on your greens and enjoy!!
Did you make this recipe?
Tag @bethemasterpiece on instagram and hashtag it #karinnicole
Created using The Recipes Generator


Gluten Free Protein Pancakes

Sometimes I just need pancakes. But I also work real hard to start my day off in a way that my workout will feel good, and not grueling! And that’s how these pancakes were born! Let me know what flour you used, and how they turned out!

Yield: 2
Author:

Gluten Free Protein Pancakes

Buckwheat flour or a gluten free flour blend would be great for these pancakes!
Prep time: Cook time: Total time:

Ingredients:

  • 1 cup cottage cheese
  • 4 eggs
  • 1/2 cup gluten free flour
  • 1/4 tsp salt
  • 1/4 cup coconut oil
  • 1/2 cup milk
  • 1/2 tsp vanilla

Instructions:

  1. Mix in blender for 1 minute, preferably a high speed blender!  
  2. Cook on lightly greased griddle.
Did you make this recipe?
Tag @bethemasterpiece on instagram and hashtag it #karinnicole
Created using The Recipes Generator

Sprouted Beans

Check out the blog post here, where I tell you why the sprouted bean is not only a nutritional powerhouse, but it’s a superfood that you really should ALWAYS have on hand.

shelley-pauls-t4X660oKiYs-unsplash.jpg


It’s really quite simple!! Place your beans in a bowl and soak for 8 hours. Then rinse.

From here on out, you’ll rinse your beans several times a day, for 2-5 days depending on the type of seed you are using. It is very important that you rinse several times a day. The enzymes formed can be toxic to the developing bean pod, unless you rinse throughly. You may begin to smell a slight sour smell, but at no time should your beans smell rancid. If they do, dump them out, and try again, making sure to rinse frequently.

After about two days you should begin to see the smallest shoot emerging from the side of the bean seed. If you haven’t tried bean sprouts before, and you want to make sure your family will enjoy your bean sprouts, stop here, and cook as you normally would regular soaked beans. Be aware though, your cooking time will be much, much shorter, so keep an eye on your bean pot!

When they are cooked to the desired amount, drain your cooking water, add just a touch of fresh, add spices you desire. My personal favorite is simply salt, pepper, and fresh garlic!

Your family will never notice the difference in the taste and consistency of your beans, but your body sure will! No more digestive upset, and lots for bioavailable vitamins and minerals!

And that’s it!! Fresh cooked bean sprouts! Enjoy!

Yumm Sauce- Better than the Real Thing!!

Have you been to Cafe Yumm? It’s a family favorite of ours, so much so that it gave me inspiration to hunt down a recipe for their famous sauce. I’ve tried a whole bunch of recipes. And since we love the sauce SO much, we make it every couple of weeks at my house, and I’ve modified it to be what you see below.

A dear friend asked me for the recipe, and I tried to print out a version from an internet search. Allison, this is for you!! But I realized I do SO many things different that it’s best to just share my version. What do I do differently? I leave out the tofu, I use a different oil than canola, and I prefer almond butter over using almonds. I also omit some of the spices. What you cannot substitute is the real lemon juice! It’s just not the same without the real thing!!

yummingred.jpg

It’s as simple as adding the ingredients to your food processor or your blender, checking to make sure you absolutely love your flavor combo, adjust as necessary, and presto!!

What do we use this on? We love rice bowls. That’s how they do it in the restaurant! Protein of choice, rice, beans, some roasted vegetables, cilantro, salsa, olives, maybe some sour cream and shredded cheddar if you and dairy get along. But you can use your imagination on the rice bowl concept! So good in so very many ways! And just as a simple accompaniment to some chicken skewers with quinoa and rice!

chicken.JPG

Let me know how you enjoy your Yumm Sauce! I’d love some new ideas!

In health and wellness,

Karin

Yumm Sauce- better than the real thing!

Yumm Sauce- better than the real thing!

Author:
prep time: 10 Mcook time: total time: 10 M
This is my favorite restaurant sauce! I've tried lots of remakes, and I've ramped them up to create this rendition. May you enjoy it as much as I do! From the original recipe, I omit the tofu. I use almond butter instead of whole almonds for extra creaminess. And I don't use a canola oil as it's not a friend to hormone health. Hope you love this recipe as much as my family does! This recipe makes enough for a family of 5 to enjoy for an accompaniment to rice bowls. I like to freeze the rest in freezable canning jars for future meals.

ingredients:

  • 1/2 cup oil- olive, sesame (not toasted), or avocado
  • 1/2 cup almond butter
  • 1 can chickpeas (garbanzos), liquid and all
  • 1/3 cup FRESH lemon juice (juice from about one lemon) 
  • 2 cloves crushed garlic
  • 1/2 teaspoon salt
  • 1/4 teaspoon pepper
  • 2 teaspoons curry powder
  • 1 teaspoon oregano
  • 1/2 cup nutritional yeast

instructions:

How to cook Yumm Sauce- better than the real thing!

  1. 1)  In a food processor or Vitamin, blend the first four ingredients until smooth.
  2. 2)  Add the rest of the ingredients and blend until thoroughly combined.
  3. 3)  Give it a taste and adjust the salt, lemon juice, and curry to your desired taste.
  4. 4)  Add up to 1/2 cup additional water for a thinner sauce.
  5. 5)  Enjoy!!
Did you make this recipe?
Tag @bethemasterpiece on instagram and hashtag it #karinnicole
Created using The Recipes Generator

Oh I know… you had your rice bowls, you don’t have 3 boys in your family, and you actually have leftovers??? First, I’m super jealous. Seems like everything I make gets eaten around here. Second, freeze it!! You’re all set for next time!

I love these star-embellished canning jars. They can go in the freezer! So I put any extra in the freezer, and when I went to have Yumm bowls next time, I take them out of the freezer, and if I’m really on my game I set them in the refrigerator the night before for thawed yumm sauce next evening. When I’m not on my game, I grab them out of the freezer while a child is hollering for yumm, and nuke it for 30 seconds at a time, stirring between nukings. I WILL SAY, this nuking churns my stomach, as I DO KNOW that most of the awesome amazing nutrients in my yumm get obliterated by my nuking… but sometimes, that’s what I do!!

Enjoy your Yumm!!

In love and wellness,

Karin

The Best Gluten Free Stuffing Recipe, in the Crockpot!!

Adjustments.jpeg

I save making stuffing for the holiday, usually Thanksgiving. There’s no extra space in the oven on Thanksgiving day, so any opportunity to make-ahead, or cook in the crockpot is a win for me! This stuffing recipe is a cinch to prepare. Your guests won’t know that it is gluten free, so you won’t have to worry about modifying anything for your wheat-eating family members! You’ll need a loaf or two of your favorite gluten free bread. Those on a paleo diet can use their favorite store bought bread for this recipe to decrease the carb count and make it fit into your plan. For me, Thanksgiving is the day when I make more traditional gluten free options for my family, with all the added carbs!

Start by cutting your gluten free bread loaves into cubes. Place in the oven at 325 and lightly toast the cubes, just until dry, not brown. Make sure you stir your bread cubes every few minutes. You should find that this takes only 5 to 10 minutes at most.

IMG_4188.jpeg

Next, melt the butter in a saucepan and dice up 2 cups of celery and two onions. Lightly sauté your vegetables for a few minutes, just until slightly translucent.

Brown the sausage. Combine with your other ingredients, and add it to the crockpot.

Cook on high for 30 minutes, then shift to low for the remaining 3 to 4 hours. It’s important not to lift the lid while it’s cooking, and not to go beyond the 4 hours cooking time. So if you’re planning your holiday meal, you can prepare this all ahead of time, but just adjust when you start your slow cooker to cooking!

Enjoy!


Yield: 12 servings
Author:
Best Gluten Free Stuffing

Best Gluten Free Stuffing

prep time: 20 Mcook time: 4 hourtotal time: 4 H & 20 M
Save the oven space on Thanksgiving day! Make the BEST gluten free stuffing in your crockpot!

ingredients:

  • 1/2 cup butter
  • 2 onions chopped
  • 2 cups celery chopped
  • 1 1/2 pounds sausage (Italian elk sausage is my favorite)
  • 10 cups cubed gluten free bread
  • 1/2 tsp black pepper
  • 1/2 tsp salt
  • 2 1/2 tsp poultry seasoning
  • 1/2 tsp sage
  • 2 eggs
  • 3 cups chicken broth

instructions:

How to cook Best Gluten Free Stuffing

  1. 1.  Place cubed bread on a cookie sheet and lightly toast in a 325 degree oven until dry, crouton-like texture.  Set aside in large bowl..  (This step can be done up to two days ahead!)
  2. 2.  Melt the butter in a saucepan over low to medium heat.  Add in onions and celery and sauce until slightly translucent.  Add to cubed bread.
  3. 3.  Brown the sausage.  Add spices.  Combine with the bread mixture.
  4. 4.  Lightly whisk eggs, combine with chicken broth, and add to the bowl.
  5. 5.  Gently mix all ingredients.
  6. 6.  Place into a 6-8 qt. slow cooker.  Cook on high for 30 minutes, then turn down to low for 3-4 hours.
  7. 7.  Enjoy!!
Did you make this recipe?
Tag @bethemasterpiece on instagram and hashtag it #karinnicole
Created using The Recipes Generator

Iced Turmeric Tummy Tonic

Yield: 1 serving
Author:
Turmeric Tummy Tonic

Turmeric Tummy Tonic

prep time: 5 Mcook time: total time: 5 M
This tonic is a powerhouse of benefits! Turmeric is a powerful inflammation rockstar, collagen restores gut health, and MCT oil improves brain function and increases metabolism! Great addition for autoimmune or thyroid wellness!

ingredients:

  • 1/2 cup coconut milk
  • 1/2 cup cold water
  • 1 Tbsp maple syrup
  • 1 teaspoon turmeric with pepper
  • 1 teaspoon integral collagen
  • 1/2 tsp cinnamon
  • 1 teaspoon MCT oil
  • 1 cup water
  • 1/2 to 1 Cup iced cube

instructions:

How to cook Turmeric Tummy Tonic

  1. Combine all incredients in high speed blender
  2. Sprinkle with cinnamon.
  3. Blend and enjoy!

Calories

341.34

Fat (grams)

28.78

Sat. Fat (grams)

25.19

Carbs (grams)

21.17

Fiber (grams)

1.97

Net carbs

19.20

Sugar (grams)

12.23

Protein (grams)

4.88

Sodium (milligrams)

37.28

Cholesterol (grams)

0.00
Did you make this recipe?
Tag @bethemasterpiece on instagram and hashtag it #karinnicole
Created using The Recipes Generator

Keep Calm Juice

Keep calm juice.png

When we frazzled, our gut doesn't work optimally, which means our immune system in compromised. This juice includes collagen to heal your gut, celery juice which helps with inflammation and energy, carrot juice with a powerhouse of antioxidants, and my super secret stress relieving ingredient, ashwaghanda root, which helps you feel calm and less frazzled!

This juice will help you start your day grounded, not stressed, and ready to take on whatever the day may hold!

Keep Calm Juice

Makes: 1 serving

Cold and Flu Remedy Tea

Prep time:

Ingredients:
  • 3 carrots
  • 3 stalks celery
  • 1 peeled orange
  • 1 teaspoon collagen powderli>
  • 1/2 teaspoon ashawaghanda rootli>

    Instructions:
    1. Juice your celery, carrots, and orange using your juicing machine.
    2. Combine with collagen and ashwaghanda
    3. Blend just to combine in high powered blender
    4. Enjoy!


Cajun Spice Mix

It’s grill season! I like to come up with creative ways to change up my grill creations, but some of those grocery store spice mixes can be so costly, in addition to including ingredients that I’d rather not be there. Here’s a great cajun spice mix that would be a great addition for your grilled vegetables or meat!

Cajun Spice Mix

A spicy dress up for your grilled creations!

Makes: About 3/4 Cup

Cold and Flu Remedy Tea

Prep time:

Cook time:

Ingredients:
  • 2 Tbsp garlic powder
  • 2 Tbsp paprika
  • 1 tsp to 1 Tbsp cayenne pepper (more or less to taste)
  • 1 Tbsp sea salt
  • 1 Tbsp black pepper
  • 1 Tbsp oregano
  • 1 Tbsp thyme leaves
  • 1 Tbsp onion powder
  • Instructions:
    1. Combine the ingredients in a small bowl and use as desired on vegetables or meats prior to grilling.

Chocolatey Coconut Valentine Hearts

Coco-Coconut Valentine.png

Treat your loved ones to Valentine’s treats that do not compromise on ingredients, support your efforts at health and healing,, and let you indulge, all at the same time!!

Chocolatey Coconut Valentine Hearts

Makes: about 15 small cookies

Cold and Flu Remedy Tea

Prep time:

Cook time:

Ingredients:
    For the cookie dough base.
  • 1 1/2 cup unsweetned shredded coconut
  • 1/4 cup coconut oil, melted
  • 1/2 cup raw honey
  • For the chocolate dip
  • 1/2 cup chocolate chips (I like the paleo ones, with coconut sugar and real cacao, from WildRoots!)
  • 2 Tbsp coconut oil
  • Instructions:
    1. Mix shredded coconut, honey, and the 1/4 cup coconut oil in a small bowl.
    2. With lightly oiled hands, firmly pack cookie dough base to a thickness of approximately 1/4 inch on a parchment lined tray.
    3. Cut out with small heart shaped cookie cutter, but do not disturb cookies
    4. Place in freezer for 10 minutes.
    5. Meanwhile, melt chocolate chips and remaining coconut oil over low heat in a saucepan.
    6. Remove cookies from freezer. While still cold, dip as desired in the chocolate dip.
    7. Place in cool location to allow chocolate and cookies to firm up, or keep stored in the refrigerator.
    8. Enjoy with your loved ones!!

I love this recipe for its simplicity!! Love the simple flavors, and of course, love the chocolate.


Without binders and lots of extra ingredients, the prep might need a little explanation.


When you are preparing your cookie dough base, use lightly oiled fingers to firm the cookie dough together tightly, so that it doesn’t crumble when you work with it later. Heres what mine looked like!

valentine1.JPG

While still at room temperature, use your cookie cutters to indent into the dough, but do not try and break it apart at this point, or it will crumble.

valentine2.jpg

After you freeze for 5-10 minutes, then break cookies apart, dip in your chocolate dip. Place into cool spot for the chocolate to set. Then enjoy!!

Happy Valentine’s Day to you and your loved ones!!

Roasted Red Pepper Aioli, as Dip or Dressing

aioli.JPG

Start with the mayonnaise recipe found below or here. My garlic requires no prep to add to recipes, due to this process I use to make sure I always have fresh garlic on hand, fuss free.

This is a simple change to the basic mayo recipe to transform it into roasted red pepper aioli.

Roasted Red Pepper Aioli

Makes: 1 Cup

Cold and Flu Remedy Tea

Prep time:

Cook time:

Ingredients:
  • 1 batch 5 min mayonaisse
  • 1 jar roasted red peppers, or roast yourself
  • 1 clove garlic, crushed
  • Instructions:
    1. Drain jar of roasted red peppers.
    2. Chop finely in food processor or food mill.
    3. Mix mayonaisse with red peppers and garlic.
    4. Add water to desired consistency if using as a dressing for salad, or use undiluted as a dip for vegetables..

Mayonnaise!! No-fail, yummy Mayonnaise!

5 min mayo.png

Want to see it done? Check out the video below! Need more ways to cut out the bad fats and nourish yourself with REAL food?

It's hard to find a mayonnaise that isn't made with soy and canola oill Not sure why it matters? Check out my blog post here. This one is soy free, processed-crud free!! Whole 30 compliant, Detox compliant!

No Fail Mayonnaise

Your mayonnaise should be nourishing! Here's one that is!

Makes: 1 Cup

Cold and Flu Remedy Tea

Prep time:

Cook time:

Ingredients:
  • 1 cup mild tasting olive oil
  • juice of ¼ lemon
  • 1/2 -1 tsp teaspoon ground mustard
  • 1 tsp salt
  • 1 clove crushed garlic, optional
  • 2 eggs, room temperature
  • Instructions:
    1. OH it's so easy!! You don't even need this instruction section!
    2. Add everything into your container that will hold your immersion blender easily.
    3. Blend for 30-60 seconds until your mayonnaise turns nice and creamy and thick! Enjoy!

Maple Pecans

This pan roasted recipe is a great fast and easy way to make a festive, sweet, and slightly salty favorite that’s great to enjoy around the holidays. I like to use all natural maple syrup. If you would like them a little sweeter, you may add a bit more maple syrup

pan roasted maple pecans.png


Pan Roasted Maple Pecans

Slightly sweet, slightly salty holiday favorite

Makes: 1 Cup

Cold and Flu Remedy Tea

Prep time:

Cook time:

Ingredients:
  • 1 cup pecans
  • 1 tablespoon maple syrup
  • ½ tsp salt
  • Instructions:
    1. Place pecans in a frying pan and toast over medium-low heat until lightly browned. Turn off heat.
    2. Add maple syrup stir well. Turn heat back to low. Cook with stirring until pecans become sticky, about 2 minutes.
    3. Spread pecans onto parchment paper or silicone baking mat. Sprinkle with salt. Allow to cool completely.

Gluten Free Pumpkin Scones

Author: Karin

gluten free pumpkin scones.png

Gluten Free Pumpkin Scones

Mild pumpkin taste, flaky texture!

Makes: 15 Scones

Cold and Flu Remedy Tea

Prep Time:

Cook time:


Ingredients:
  • 2 1/2 cup gluten free flour blend
  • 1/2 cup almond flour
  • 1/2 cup gluten free oats
  • 1 Tbsp baking powder
  • 1 teaspoon xanthan gum
  • 1/2 cup natural sugar, like demerara raw
  • 1 teaspoon salt
  • 1 tablespoon cinnamon
  • 1 cup cold butter, cut into small pieces
  • 1 teaspoon gluten free vanilla
  • 1/3 cup milk, your choice
  • 1/2 cup pumpkin puree
  • 2 eggs
  • For the glaze:
  • 1/2 cup sugar
  • 1 tablespoon molasses or maple syrup
  • Instructions:
    1. Preheat your oven to 450 degrees. Line a baking sheet with parchment.
    2. Combine gluten free flour, almond flour, oats, baking powder, xanthan gum, sugar, salt, and cinnamon in bowl.
    3. Cut in cold chopped butter.
    4. Combine eggs, vanilla, milk,and pumpkin puree in a separate bowl
    5. Pour the wet ingredients over the flour mixture and stir just until combined
    6. Turn onto parchment lined cookie sheet. Divide into two pie shaped circles 3/4 " in thickness. Cut into triangle pieces and separate on cookie sheet.
    7. Bake at 425 degrees until lightly browned, approximately 22 minutes. Check at 18 minutes!
  • For the glaze, combine 1/2 cup sugar, and 1 tablespoon molasses or maple syrup in a saucepan with enough water to stir easily. Drizzle onto scones when they first come out of the oven. Enjoy!.

  • Cold and Flu Remedy Tea

    Author: Karin

    I’m starting to hear of friends and families with cold and flu type symptoms starting… so I’m pulling this out!

    coldandflutea.jpg
    Prepare this at the first symptoms to speed up your recovery!
    Double the recipe if you are preparing for more than one person, or would like additional servings for later

    Cold and Flu Remedy Tea

    Only 5 Minutes and your on your way!

    Makes: 1 Cup

    Cold and Flu Remedy Tea

    Prep time:

    Cook time:

    Ingredients:
    • 1/2 clove garlic
    • juice of ¼ lemon
    • 1 teaspoon finely shredded ginger
    • 1 teaspoon raw honey, or to tasteli> ingredient name
    • Instructions:
      1. Add garlic and ginger to one cup hot, but not boiling water
      2. Combine lemon juice
      3. When warm, but not boiling, add raw honey

    Honey Maple Nut Granola

    Author: Karin

    Grocery store granola contains chemicals, fats, sugars, and grains that are not beneficial for healing autoimmune conditions and thyroid disease, and balancing hormones. This granola is full of good stuff, good fats, good sugars, and excellent nourishment! If you’ve never made granola before, it’s as easy as can be . Just mix up the ingredients and dry at low temperature, in your oven, or in a dehydrator. Enjoy!

    Our favorite way to enjoy this scrumptious breakfast is with our favorite yogurt, whole milk or nondairy milk and fresh blueberries or blackberries!!

    Our favorite way to enjoy this scrumptious breakfast is with our favorite yogurt, whole milk or nondairy milk and fresh blueberries or blackberries!!

    Ingredients

    2 cups (gluten free) rolled oats

    1/4 cup chia seeds

    1/4 cup hemp seeds, ground

    1/4 cup flax seeds, ground

    1 cup chopped nuts (I used 1/2 walnuts, 1/2 pecans, with a sprinkling of pumpkin seeds)

    2/3 cup coconut flakes

    1/4 cup melted coconut oil

    1/4 cup maple syrup

    1/4 cup brown rice syrup

    1/4 cup honey

    2 tsp cinnamon

    1/2 teaspoon salt

    Directions

    1. Begin my grinding flax seeds and hemp seeds. A small coffee grinder works great for this.

    2. Mix together oats, flax seeds, hemp seeds, chia seeds, and chopped nuts and coconut flakes.

    3. Add in cinnamon and salt.

    4. Melt coconut oil on low heat, mix with syrups and honey, and add.

    5. Spread mix in thin layer on cookie sheet, pushing down firmly to make a compacted layer. If you have a dehydrator, this can be done on the silicone mesh sheets for best results.

    6. Dry on lowest setting of oven, stir every hour or so. Dry until no longer sticky, dry to the touch, and compacted and crisp. Alternatively, use your dehydrator, set to 125 degrees, and dry for 24 hours.

    I love to use the excalibur dehydrator, set at 125 degrees, to make granola. This allows me to dehydrate at a low temperature, which does not cook my ingredients, and does not cook natural enzymes and nutrients.

    I love to use the excalibur dehydrator, set at 125 degrees, to make granola. This allows me to dehydrate at a low temperature, which does not cook my ingredients, and does not cook natural enzymes and nutrients.